
Professional 2×2 Video Wall Setup Guide (2026)
Why do so many professional installations still suffer from visible image gaps and frustrating signal dropouts? Achieving a seamless display requires more than just mounting four screens. It demands a precise understanding of your 2×2 video wall processor and the system architecture behind it. You likely already know that even a minor misalignment or a slight delay in the EDID handshake can turn a high-stakes presentation into a technical failure. It’s a common pain point that separates amateur setups from professional-grade systems.
We’re here to eliminate that risk. This guide provides the technical roadmap needed to master hardware configuration, bezel compensation, and signal stability for any commercial or residential environment. You’ll learn how to build a reliable system that delivers a perfectly aligned, high-resolution image without the need for constant reboots. We will cover essential hardware requirements, cabling standards for long runs, and the specific settings required to eliminate upscaling artifacts. High resolution. Perfect alignment. Total reliability. Let’s get your system operational.
Key Takeaways
- Learn how a dedicated 2×2 video wall processor manages signal distribution to create a high-impact, cost-effective digital signage solution.
- Identify the critical technical specifications, such as 4K @ 60Hz input and synchronized output, required for fluid, pro-level video performance.
- Master the physical installation process by selecting thin-bezel commercial displays and precision mounting hardware for perfect alignment.
- Resolve common configuration hurdles like image tearing and black screens by optimizing EDID handshakes and HDCP compatibility.
- Implement bezel compensation techniques to ensure a seamless image across all four displays without visual interruptions.
Understanding 2×2 Video Wall Processors and Their Applications
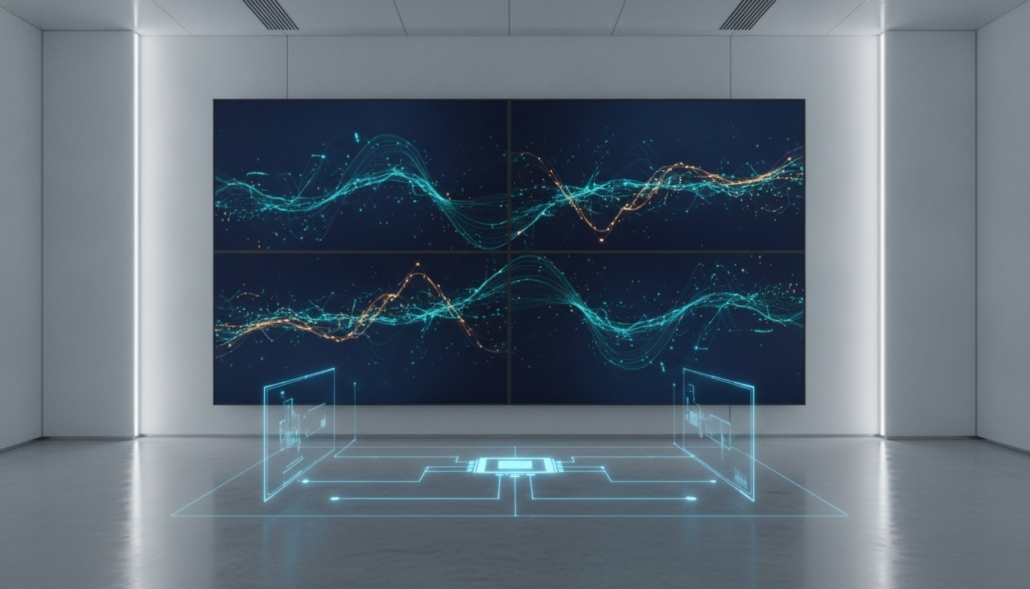
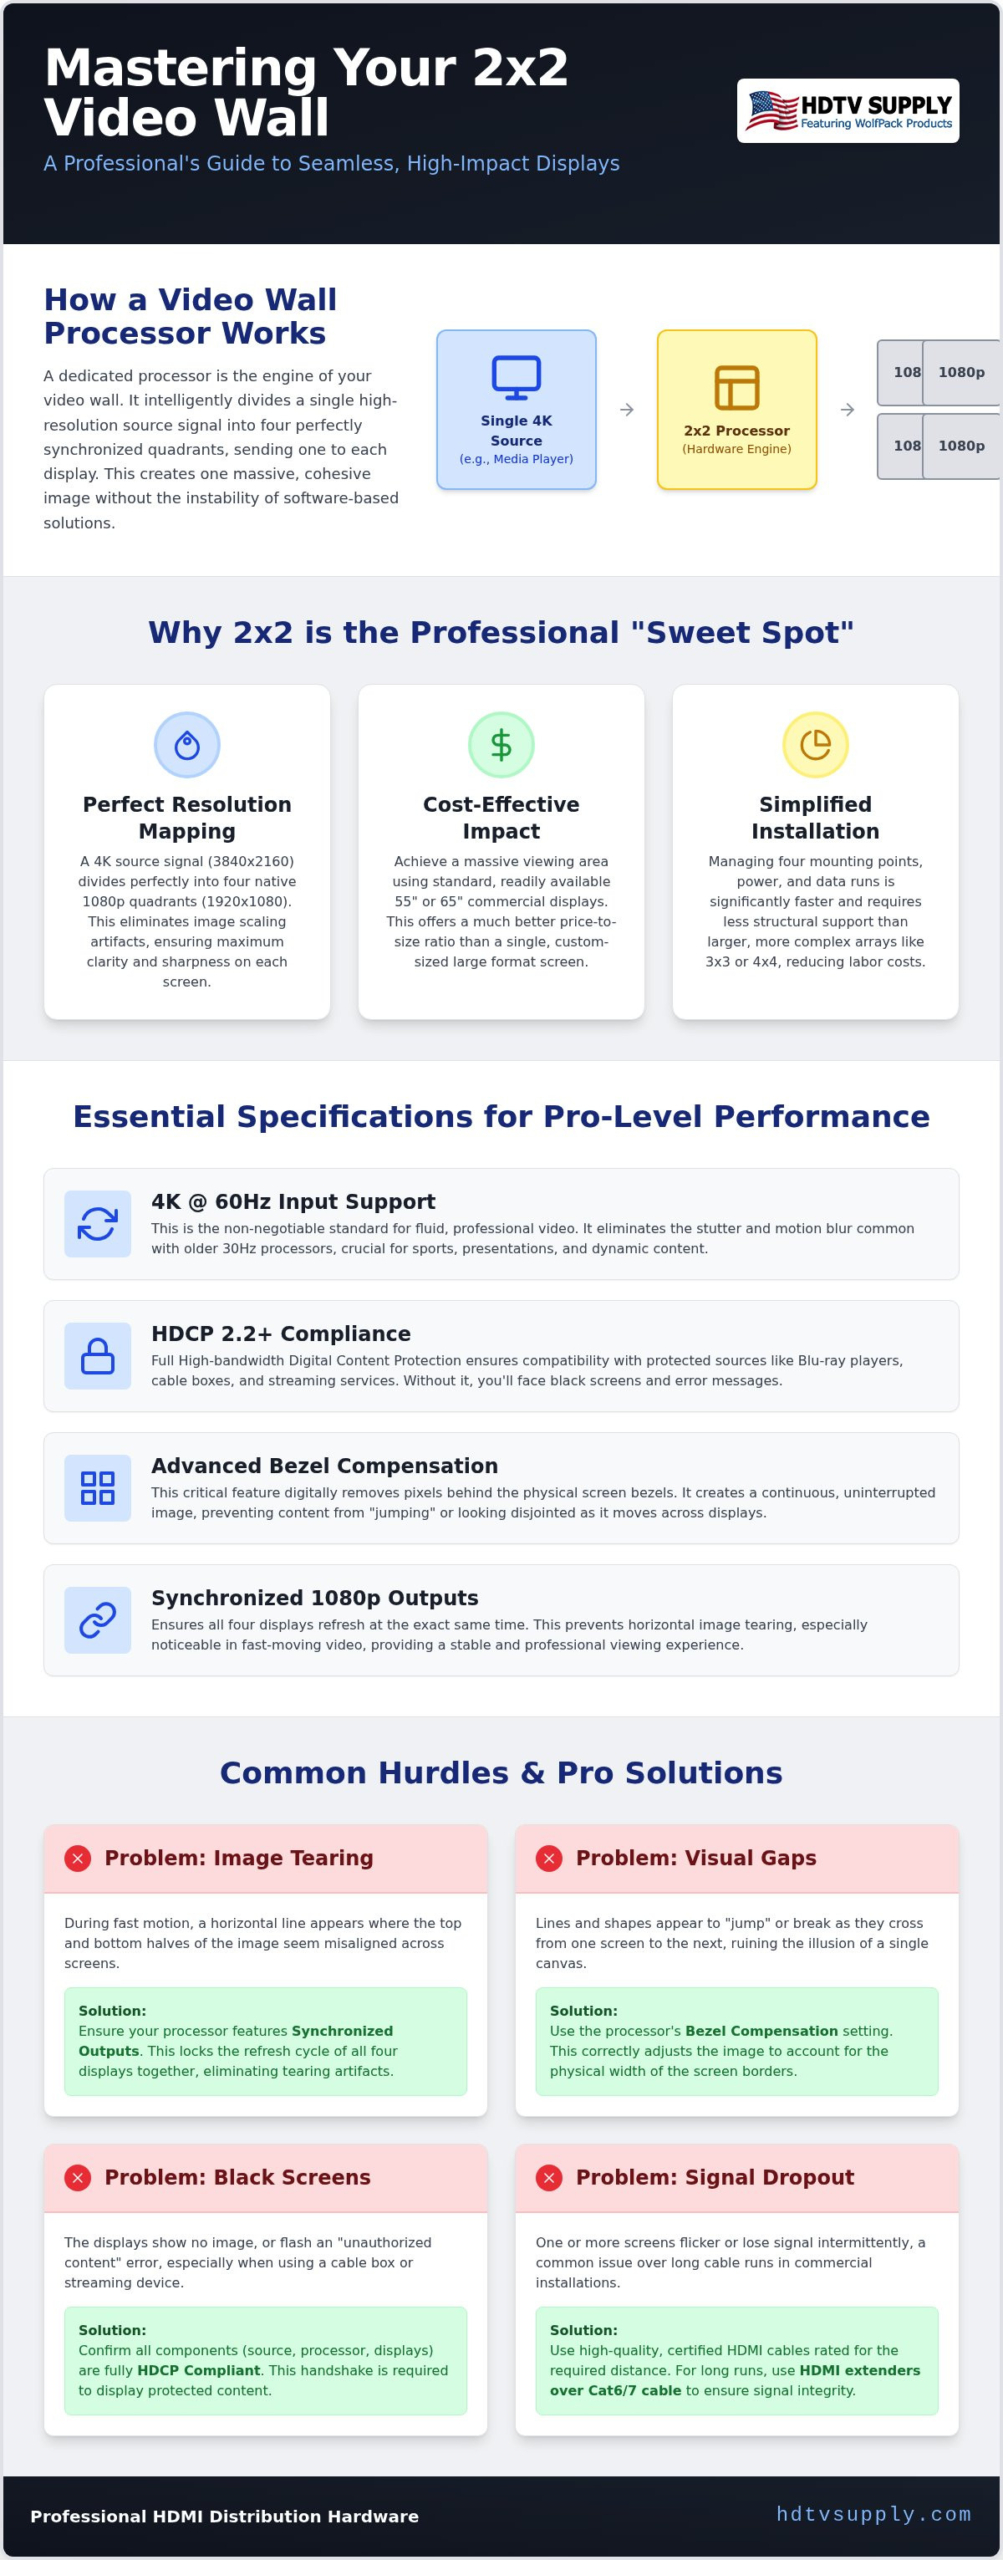
A 2×2 video wall processor is the essential hardware engine that transforms a single video input into a massive, cohesive image across four individual displays. Unlike simple splitters that merely duplicate an image, a dedicated processor intelligently segments the source signal into four distinct quadrants. This allows a standard 4K source to span across four 1080p screens with pixel-perfect accuracy. Understanding What is a Video Wall? involves recognizing that these systems are built for impact and scale, providing a visual surface area that far exceeds what a single commercial monitor can offer at a reasonable price point.
Professionals choose these systems for high-traffic environments where reliability is non-negotiable. Common applications include:
- Sports Bars: Creating a “jumbotron” effect for marquee games.
- Corporate Lobbies: Delivering high-impact brand messaging to visitors.
- Retail Storefronts: Capturing foot traffic with large-scale digital signage.
- Security Command Centers: Monitoring multiple camera feeds on a unified, large-scale display.
A hardware-based 2×2 video wall processor offers 24/7 stability that software-driven solutions simply can’t match. Hardware processors don’t suffer from operating system crashes, driver conflicts, or background update interruptions. They are built for immediate, “always-on” performance. This reliability is the primary reason why professional installers avoid PC-based controllers for mission-critical deployments.
The Difference Between a Processor and a Matrix Switcher
It’s easy to confuse these components, but their functions are distinct. A processor’s primary job is image manipulation, specifically scaling and spanning a single source across multiple outputs. In contrast, a matrix switcher’s role is complex signal routing from multiple inputs to multiple outputs. While some high-end units combine these features, understanding the video wall processor vs matrix switcher distinction is critical for system design. If your goal is simply to create one large screen from four TVs, a dedicated processor is your most efficient tool.
Why 2×2 is the “Sweet Spot” for Professional AV
The 2×2 configuration remains the industry standard because it strikes a perfect balance between visual impact and logistical simplicity. Using four standard 55-inch or 65-inch displays creates a massive viewing area without the extreme costs associated with custom 100-inch panels. Additionally, a 2×2 layout aligns perfectly with standard 4K resolution. Since a 4K signal is exactly four times the resolution of 1080p, each screen in a 2×2 grid receives a native 1080p signal. This eliminates the artifacts and blurring often seen in more complex 3×3 or 4×4 arrays that require aggressive upscaling. Installation is also faster. You deal with four mounting points rather than nine or sixteen, reducing labor hours and structural requirements.
Essential Technical Specifications for Pro-Level Performance
To achieve professional results, you can’t settle for entry-level specifications. A high-performance 2×2 video wall processor must support 4K @ 60Hz input as a baseline. This ensures fluid motion and eliminates the jarring stuttering common in older 30Hz units. For commercial sports bars or high-stakes corporate presentations, 60Hz is the non-negotiable standard for visual quality. Beyond the input, output consistency is critical. The processor must deliver four perfectly synchronized 1080p signals. If the outputs aren’t locked in sync, you’ll see horizontal tearing across the center of your wall during fast-moving scenes.
Signal protection is another hurdle often overlooked by novice installers. Your hardware must be fully HDCP compliant to handle protected content from cable boxes, Blu-ray players, and streaming devices. Without proper HDCP handshaking, your screens will remain black or display “unauthorized content” errors. If you’re building a system for a mission-critical environment, you can find professional HDMI distribution hardware that manages these handshakes automatically, preventing downtime and frustration during live events.
Bezel Compensation: The Secret to a Seamless Image
Physical bezels are the biggest enemy of a cohesive image. Even “thin-bezel” displays create a physical gap that interrupts the flow of content. Without compensation, a diagonal line moving across the screens will appear to “jump” or break at the edges. A professional 2×2 video wall processor solves this by “hiding” a specific number of pixels behind the bezel. This maintains geometric accuracy, ensuring that a circle remains a circle rather than an oval. Manual bezel adjustment is an essential feature; it allows you to fine-tune the pixel offset based on the exact millimeter width of your specific display frames.
Chroma Subsampling and Color Depth
For command centers and boardrooms where text clarity is paramount, chroma subsampling becomes the deciding factor in performance. While 4:2:0 compression is acceptable for movies, it causes “color bleeding” and blurry edges on small text. Systems like the WolfPackSecure 4K 60 4:4:4 HDMI Matrix Switchers prioritize high-bandwidth 18Gbps signals to maintain full color detail. This ensures that spreadsheets and data feeds are crisp and legible across the entire wall. Following content optimization best practices also involves leveraging 10-bit or 12-bit HDR when available. This expanded color depth provides the vibrant, lifelike visuals required for high-end retail and luxury residential theater systems.
Planning Your Video Wall Hardware and Layout
Physical planning dictates the final aesthetic and operational lifespan of your installation. While consumer televisions are tempting due to price, they lack the thin bezels and 24/7 duty cycles required for a professional 2×2 video wall processor setup. Commercial-grade displays feature bezels as small as 0.88mm to 3.5mm, ensuring the image remains cohesive across the grid. These units also include integrated thermal management to handle the heat generated by constant operation. Selecting the right hardware from the start prevents the “grid” look that plagues amateur installations. For environments where brand presentation is paramount, choosing the right video wall processor for retail storefronts is especially critical to maintaining a seamless, high-impact customer experience.
Mounting choice is equally vital. Fixed rail systems are cost-effective but make servicing nearly impossible. If the bottom-left display fails, you’ll have to dismantle the entire wall to reach it. Pop-out mounts allow individual screens to be extended forward for immediate access to cables and the processor. This flexibility reduces maintenance time from hours to minutes. Always verify that the mounting surface can support the combined weight of four displays and the mounting hardware, which can often exceed 200 pounds. For safety-conscious installers working in challenging environments, resources like the Colorado Safety Supply Company provide essential guidance on load ratings and fall protection equipment.
Don’t overlook power distribution and environmental factors. Four 55-inch commercial displays and a dedicated processor can pull significant amperage. Ensure your circuit can handle the combined load and use a professional power conditioner to protect against surges. In recessed wall environments, active ventilation is mandatory. Without proper airflow, heat builds up rapidly behind the displays, leading to panel degradation or processor thermal throttling. Maintaining a stable operating temperature is the only way to ensure 24/7 reliability.
Signal degradation is a common failure point in large-scale installs. High-quality HDMI 2.1 cables are essential for the input source to maintain 48Gbps bandwidth and support 4K@60Hz without dropouts. For cable runs exceeding 25 feet, standard copper cables often fail to maintain signal lock. Use Active Optical Cables (AOC) instead; they use fiber optics to transmit data without electromagnetic interference. This is a critical step in preventing signal loss across your infrastructure.
The Role of EDID Management
The Extended Display Identification Data (EDID) is the handshake that tells your source exactly what resolution and refresh rate to output. A mismatched EDID often results in a “no signal” message or a downgraded 720p resolution. Your 2×2 video wall processor must act as the EDID master, forcing the source to output a signal that matches the wall’s native resolution. For complex environments with multiple sources, consult our technical breakdown on Mastering HDMI Matrix EDID Management to ensure seamless switching and resolution stability.
Step-by-Step: How to Configure a 2×2 Video Wall System
Success in a video wall deployment depends on a disciplined installation workflow. Follow this sequence to transform four independent screens into a single high-performance canvas. Precision at the start prevents technical debt during the final configuration phase.
- Step 1: Physical Mounting. Use a laser level to ensure all four displays are perfectly level and plumb. Even a 2mm gap at the bottom can grow into a significant misalignment at the top of the wall.
- Step 2: Signal Connection. Connect your primary source to the input of the 2×2 video wall processor. Route the four HDMI outputs to the corresponding displays in the specific order required by your hardware’s internal mapping logic.
- Step 3: Initial Power Up. Power your displays first. Once they reach standby mode, power the processor, then finally the source. This specific sequence ensures the HDCP handshake occurs correctly across all hardware layers.
- Step 4: Mode Selection. Access the On-Screen Display (OSD) via the remote or front panel. Select the “2×2 Mode” to begin spanning the image across the grid.
- Step 5: Bezel Adjustment. Navigate to the bezel compensation menu. Increase the horizontal and vertical offsets until the image flows seamlessly across the physical frames without visual breaks or “jumps” in content.
Configuring Input and Output Settings
Your source device must match the processor’s preferred input resolution to avoid scaling artifacts. Set your PC or media player to output 4K @ 60Hz. Verify that all four displays are running at an identical refresh rate to prevent screen flickering or horizontal tearing during fast-moving video. While a remote control is sufficient for basic setups, professional installers often use RS232 or IP control for more granular adjustments and remote monitoring. If you need hardware that supports these professional control protocols, you can browse our inventory of video wall processors to find a unit that integrates with your specific control infrastructure.
180-Degree Rotation for Thin-Bezel Optimization
Many commercial displays have a thinner bezel on the top and sides than on the bottom. To minimize the total gap in the center of your wall, you can physically flip the top two monitors upside down. This places the thin top bezels against the thin bezels of the bottom row. Use the 2×2 video wall processor menu to enable the “180-degree rotation” or “mirror” function for the top two outputs. This digitally corrects the image, ensuring the content appears right-side up while significantly reducing the visible seam in the center of your display. It’s a simple mechanical trick that delivers a much more expensive look to the final installation.
Advanced Optimization and Troubleshooting for Video Walls
Technical failures in a live environment are unacceptable. Resolving a “black screen” issue begins with a systematic check of your HDMI cable seating and HDCP status. If your 2×2 video wall processor isn’t receiving a verified handshake from the source, the screens will remain dark. Image tearing, another common visual artifact, usually indicates a refresh rate mismatch. Ensure every display in the grid is set to an identical frequency, such as 60Hz, to maintain perfect vertical synchronization across the panels.
Audio extraction is a vital feature for sports bars and retail spaces where internal TV speakers are insufficient. Most professional processors include a 3.5mm analog or Toslink digital output. Use these to route sound directly to an external amplifier or soundbar. Additionally, prioritize regular firmware updates for your hardware. Keeping your WolfPack system current ensures compatibility with the latest media players and prevents intermittent software bugs that can lead to unexpected signal loss.
Solving HDCP Handshake Failures
The HDCP handshake is a digital verification process that ensures your equipment is authorized to play protected content. If your processor utilizes HDCP 2.2 but your older displays only support version 1.4, the signal will fail to initialize. You can resolve this by using an HDMI restorer or a dedicated scaler to fix version mismatches. To ensure a successful connection, always follow the professional power-on sequence: activate the displays first, then the 2×2 video wall processor, and finally the source device. This allows the handshake to flow correctly from the end of the chain back to the source.
Scaling for Large Venues: Sports Bars and Casinos
In high-capacity environments like casinos or large sports bars, a single 2×2 wall is often one component of a much larger ecosystem. You can easily integrate your wall into a broader WolfPack distribution system, allowing you to route any source to the video wall or to hundreds of individual screens simultaneously. Managing these complex configurations is simplified with the WolfPad TV Control System. This iPad-based interface provides a centralized, intuitive hub for switching sources and adjusting wall modes without manual hardware interaction. The modular architecture of these systems means you can add more sources or additional walls in the future without replacing your existing infrastructure. This scalability is what defines a professional-grade Pro AV installation.
Deploy Your High-Impact Video Wall Today
Mastering a seamless 2×2 grid requires more than just high-resolution displays. Success depends on the precise configuration of your 2×2 video wall processor, proper bezel compensation, and a disciplined power-on sequence to ensure HDCP stability. By prioritizing 4:4:4 chroma subsampling and professional mounting hardware, you eliminate the technical hurdles that compromise visual quality. Whether you’re outfitting a sports bar or a mission-critical command center, these architectural decisions define the long-term reliability of your system.
HDTV Supply has been the trusted resource for professional installers since 1998. We provide global shipping and expert guidance to ensure your project stays on schedule. Every WolfPack system includes free technical support from seasoned specialists ready to assist with complex integrations. Don’t leave your signal integrity to chance. Browse our full range of 2×2 Video Wall Processors and WolfPack Systems to find the perfect hardware for your environment. Your vision is ready for the big screen; we have the technology to make it happen.
Frequently Asked Questions
Can I use any four TVs for a 2×2 video wall processor?
You can use any four TVs with HDMI inputs, but commercial displays are highly recommended for professional results. Consumer televisions often have thick, asymmetrical bezels that create a distracting grid pattern. Additionally, consumer units aren’t designed for 24/7 operation and may overheat in a clustered configuration. Using a dedicated 2×2 video wall processor with commercial thin-bezel screens ensures a much more cohesive image and longer hardware lifespan. This setup is the professional standard.
Does a 2×2 video wall processor support audio?
Most processors support audio through HDMI pass-through to the displays or via dedicated extraction ports. You can typically find 3.5mm analog or Toslink digital outputs on the back of the unit. These ports allow you to route sound directly to an external soundbar or a professional amplifier. It’s common practice to mute the TV speakers entirely and use the processor’s extracted audio for a more immersive and controlled audio experience in sports bars and lobbies.
What is the difference between a video wall controller and a processor?
A video wall processor is typically a standalone hardware appliance designed for 24/7 reliability and instant boot times. In contrast, a video wall controller often refers to a PC-based system that uses software and multiple graphics cards to manage the displays. Hardware processors are generally preferred for mission-critical installs because they don’t suffer from operating system crashes, driver update interruptions, or the security vulnerabilities associated with a standard computer. They prioritize stability and immediate signal accessibility.
How do I fix the gap between the screens (bezel compensation)?
You fix the gap by accessing the bezel compensation settings within the processor’s on-screen display or control software. This feature allows you to digitally hide a specific number of pixels behind the physical frames of the TVs. By adjusting these horizontal and vertical offsets, you ensure that diagonal lines and moving objects transition smoothly across the screens. Without this adjustment, the image will appear broken or disjointed at every seam where the physical display bezels meet.
Can I display four different things on the screens with a 2×2 processor?
Standard 2×2 processors are designed to span a single video source across four screens. If you need to display four different sources simultaneously, you’ll require a more advanced modular matrix switcher with video wall capabilities. These systems allow you to toggle between a unified wall mode and a multi-view mode where each screen shows an independent feed. This flexibility is essential for command centers or sports bars that need to monitor multiple data streams at once.
What is the maximum distance I can run cables from the processor to the TVs?
Standard copper HDMI cables generally reach a maximum reliable distance of 25 feet before signal degradation occurs. If your displays are located further away, you must use Active Optical Cables (AOC) or HDMI over Cat6 extenders. AOC cables can maintain a 4K @ 60Hz signal over 100 feet without needing external power. For massive venues, utilizing professional distribution hardware ensures that signal integrity remains high regardless of the distance between the processor and the four monitors.
Do I need a special computer or graphics card for a 2×2 video wall?
You don’t need a specialized computer or a multi-output graphics card when using a hardware-based 2×2 video wall processor. The processor takes a single standard HDMI output from any PC, media player, or cable box and handles the splitting and scaling internally. This simplifies your source requirements significantly. You can use a standard laptop or a small form factor media player as your input, provided it can output the desired resolution for your specific display grid.
Does a 2×2 video wall processor work with 4K content?
Modern 2×2 video wall processors are fully compatible with 4K content at 60Hz refresh rates. The device accepts the 4K signal and divides it into four 1080p quadrants, ensuring each display receives its native resolution for maximum clarity. It’s critical to verify that your processor supports HDCP 2.2 or higher to ensure compatibility with 4K streaming devices and UHD Blu-ray players. This setup provides four times the detail of a standard high-definition video wall installation.
Leave a Reply
Want to join the discussion?Feel free to contribute!